Background info: Ever since I bought and began using my 9" Southbend lathe (years ago), I have wished for the accuracy of collets. Well, with the introduction of this super precision collet chuck, my needs have finally been met. This piece of tooling looks beautiful - the finish and workmanship are flawless.
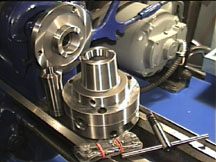
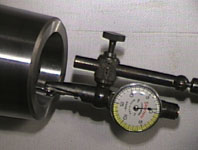
The image at the left shows what comes with the collet chuck. The precision turned and ground adaptor plate is shown screwed on the lathe spindle. The 5C Bison brand collet chuck is sitting on the lathe ways. Next to the chuck is one free collet, the needed bolts, allen wrenches, and chuck key.
 Installing the 5C Collet Chuck:
The first thing I did after screwing the precision adaptor plate onto the cleaned lathe spindle was to check the accuracy of the plate. Hmmmm....it turned out to be better than the lathe! I think I need to tighten up my lathe a bit!
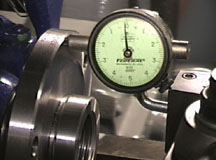
Next I loosely bolted the chuck to the adaptor plate. I set up a guage to measure the run out of the inside tapered shoulder where the collets are seated. I figured that if this was inaccurate, the collets never would run true. The image below might be clearer.
Notice the allen wrench sticking out of the chuck in these two images. There are four adjusting bolts (socket head machine screws) for making fine adjustments to the position of the chuck body. This is a trial and error method which should take no more than one hour total. The indicator shows the "low" and "high" sections. One side adjusting screw can be loosened while the opposite side is tightened. You can get the chuck to run amazingly true by this method.
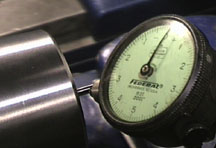
At the left is a close up view of the indicator and the taper of the chuck. When everything is true, tighten up the bolts securing the chuck to the adaptor plate.

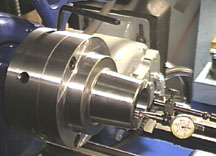
After truing up the taper of the collet chuck, I decided to test the accuracy of the whole system with a collet installed. At the right you can see the 1/8" test collet with an 1/8" dowel pin held securely. It is against this dowel pin that I set the indicator to determine how things were going.
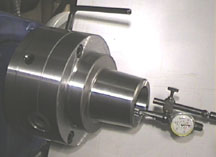
At the left you can see the indicator in position.
Conclusions:
I have not posted the run out measured on my lathe because it would be meaningless. Your lathe would get different measurements. I will say that the accuracy is better than I had hoped for and on a new and slightly tighter lathe would most likely meet the .0004" T.I.R. as advertised. I did come very close on my Southbend!
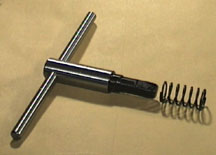
The only thing I did to modify the equipment was to remove the safety spring from the chuck key. This makes keeping the key in the chuck during the installation/removal of collets much easier.
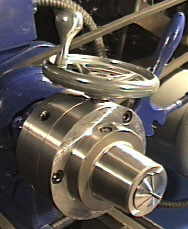
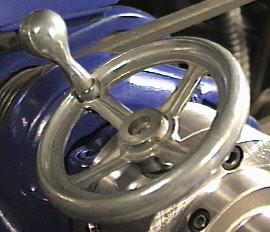
My final solution to the problem:
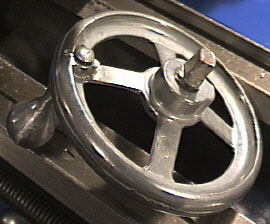
Several years ago I needed to buy a new hand wheel for one of my wood lathes. Sears sold them in pairs as replacements for the plastic hand wheels which come with their table saws. So, I had one left over. All I did was to take a 1 1/2" length of 1/2" round cold roll steel and grind the end square to fit the collet chuck. This short piece of steel was inserted into the hand wheel and tightened into position. I now have a "spinner" for my collet chuck! The images show it in action.
Click here to return to James P. Riser's machinery page.