Installing a 3" Riser Block on a Barker Mill
Copyright 2011 by James P. Riser
The Barker milling machine is a small precision horizontal
mill.  This size is perfect for my small one man shop and
the items that I manufacture. This machine was purchased with
several jobs for it in mind. To make this a reality I needed to
add a 3" riser block. This page describes how I chose to
install the block.
The machine weighs around 175 pounds and is too heavy
to just lift to insert the block. I utilized my hydraulic lift
table and my engine hoist to do the heavy work.
The first thing I did was to tip the machine over (resting
it on a wooden 4 x 4 for support) to expose the bolts that I needed
to remove. The underside of the base looks like this.

 Here is the base separated from the column. The image
on the left is as separated. The image on the right is with all
mating surfaces cleaned up.

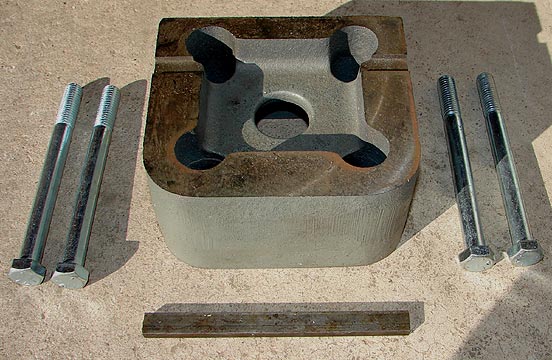
 Here is the heavy cast iron block with its key cleaned
and ready to be installed.

 The entire top of the Barker was lifted and supported
by my engine hoist. This held it in position for seating onto
the block.
 Notice that I slid one bolt into position and slid
the machine base partially off of the cart surface. This gave
me clearance underneath for tightening the bolt.
 Instead of lowering the top on to the base, I slowly
raised the cart surface up to align the base, block, keys, and
top portions of the machine. The first bolt was then finger tightened
in position. This was repeated with two of the other bolts.

 To install the fourth bolt and still keep everything
supported by the cart surface, I needed to tip over the machine.
Once this bolt was installed, everything was securely tightened.
The newly installed riser block can be seen in position below.

 To accomplish what I want to with this machine I needed
to make an arbor to fit the 3C collets and to hold the required
small cutters.
Here is one such cutter with its arbor.
 One of the jobs I have planned for this machine requires
a small rotary table. The new 3" riser block allows this.

 For several tasks where I require some angled cuts
I can clamp down my tilting table.
 The angle is adjusted
with the crank.
  A vise can be clamped to the tilting table.

 For precise angles a sine vise may be used.
 Spacer blocks will
accurately hold the angle.
 I picked up this pin wrench for tightening and releasing
collets.
 The next addition to this machine will be to mount
a modified WW lathe bed, headstock, and tailstock onto the mill
table for several specialized tasks. I'll post those pictures
when I get around to the job.


 The angle is adjusted
with the crank.


 Spacer blocks will
accurately hold the angle.
