Making a Loose Fitting Rivet
With The
FrankenRiveter
(named after Frankenstein's Monster)
Copyright 2012 by James P. Riser
For a special product that I manufacture I needed to
have a movable riveted joint between a number of parts. To complicate
matters, the rivet head needed to be within a 1/8" recess.
An orbital riveter sounded like the right machine for
the task at hand. After getting sticker shock from seeing the
prices of new machines, I went looking for a used one in semi-servicable
condition.
Living for business gambles, I bought the following
machine untested and unseen.
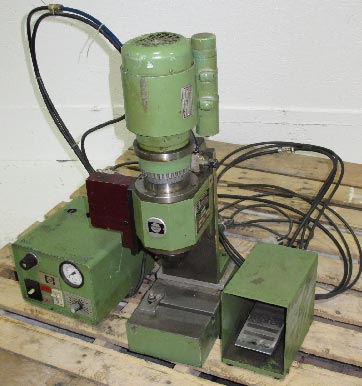 This is the unit
that I decided upon purchasing.
It came with the controller.
This is the unit
that I decided upon purchasing.
It came with the controller. 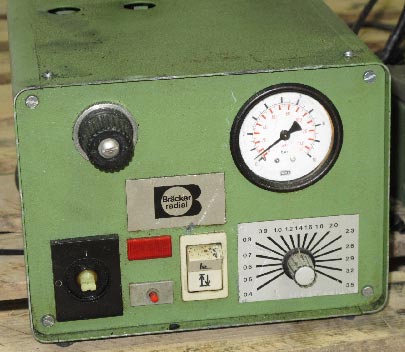 It turned out that the controller worked but the riveter
had leaking gaskets inside and the up/down movement by air pressure
was not reliable (jerky movement).
Since it arrived in this crate, problems should not
have come as a surprise.
It turned out that the controller worked but the riveter
had leaking gaskets inside and the up/down movement by air pressure
was not reliable (jerky movement).
Since it arrived in this crate, problems should not
have come as a surprise.
 Fortunately, I can fix or devise a work-around for
most problems with machinery.
Fortunately, I can fix or devise a work-around for
most problems with machinery.
 I think the machine
was made in France.
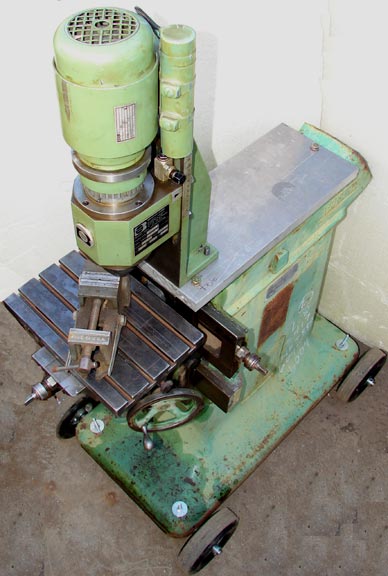
I decided to remove the head unit from its base and
adapt an old Gorton 3U pantograph base to work with the riveter.
After removing lots of rust from the base sitting outside in the
weather for years, I was able to get the table to move again as
I needed it to do.
I think the machine
was made in France.
I decided to remove the head unit from its base and
adapt an old Gorton 3U pantograph base to work with the riveter.
After removing lots of rust from the base sitting outside in the
weather for years, I was able to get the table to move again as
I needed it to do.
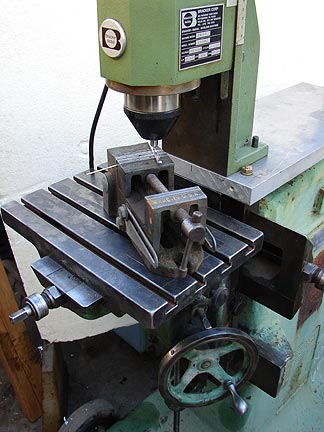
 Here is the finished
FrankenRiveter on its now wheeled base. This outfit is heavy and
solid!
I decided to keep the old "War Finish" paint
on the Gorton base even though it was in bad shape.
Here is the finished
FrankenRiveter on its now wheeled base. This outfit is heavy and
solid!
I decided to keep the old "War Finish" paint
on the Gorton base even though it was in bad shape. 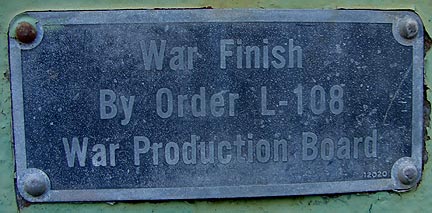 On the vise are the two parts to be test riveted -
a brass rod and a square aluminum bar.
On the vise are the two parts to be test riveted -
a brass rod and a square aluminum bar. 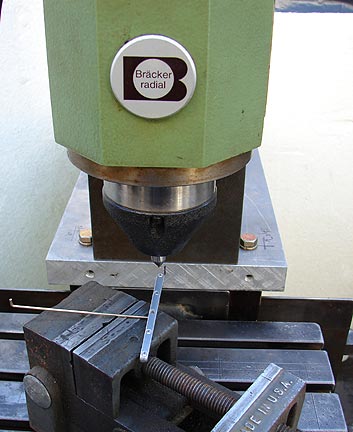
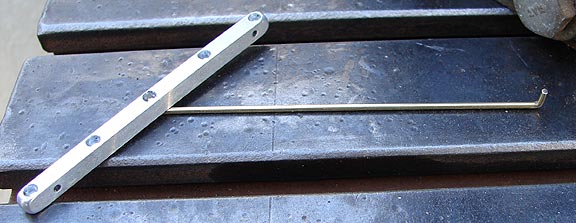 These are the items
to be riveted so that the brass bar can still move.
Before showing the result I will show a few closeups
of the action.
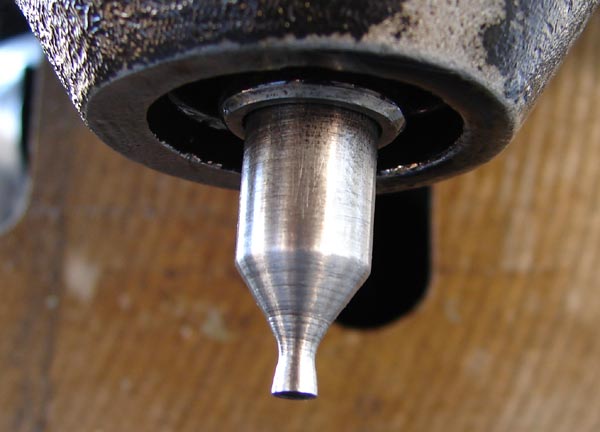
The custom trial tooling was made from oil hardening
tool steel. Barely showing here is a 6 degree taper on the tip
and its concave end. The tooling merely slips in to the machine
and is held in place by an internal magnet. In use the riveter
slowly forms the rivet end into a domed mushroom shape without
thickening the rod where it passes through the aluminum. Impact
riveting will not work for this job.
These are the items
to be riveted so that the brass bar can still move.
Before showing the result I will show a few closeups
of the action.
The custom trial tooling was made from oil hardening
tool steel. Barely showing here is a 6 degree taper on the tip
and its concave end. The tooling merely slips in to the machine
and is held in place by an internal magnet. In use the riveter
slowly forms the rivet end into a domed mushroom shape without
thickening the rod where it passes through the aluminum. Impact
riveting will not work for this job.

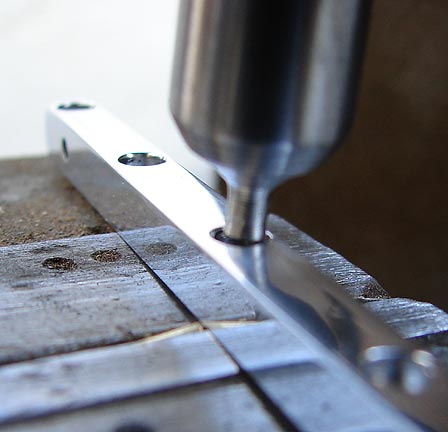
 Using the old Gorton base crank, I raise the items
up to the spinning tool. The tool does not merely spin but is
at an angle and orbits the very tip (tooling length is critical).
With a little pressure the rivet head is formed.
Using the old Gorton base crank, I raise the items
up to the spinning tool. The tool does not merely spin but is
at an angle and orbits the very tip (tooling length is critical).
With a little pressure the rivet head is formed.

 One of the characteristics of this item that I manufacture
is the deep recess for the riveted ends. Other makers do not do
this.
One of the characteristics of this item that I manufacture
is the deep recess for the riveted ends. Other makers do not do
this.
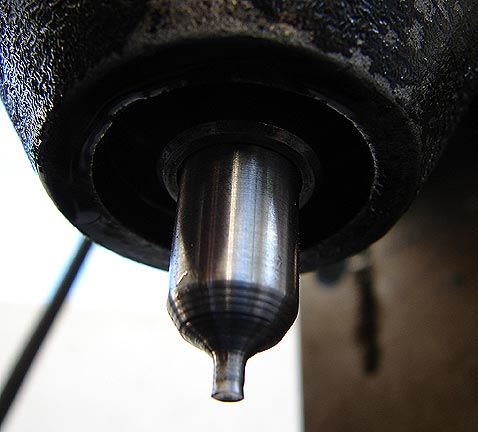
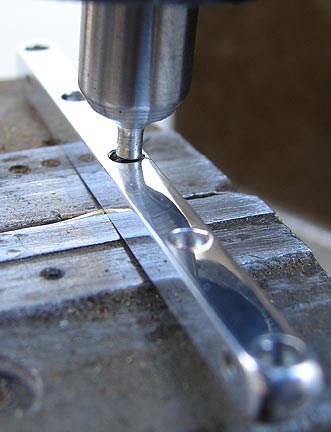 Here is the finished product - a perfectly formed loose
rivet head.
Here is the finished product - a perfectly formed loose
rivet head. 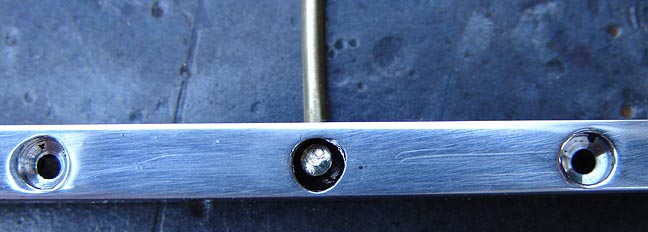 After this initial success, I made 4 new snap peens
(final tooling) to plug into the machine as needed for
other jobs. The job at hand dictates the shape and size of the
tooling.
After this initial success, I made 4 new snap peens
(final tooling) to plug into the machine as needed for
other jobs. The job at hand dictates the shape and size of the
tooling.
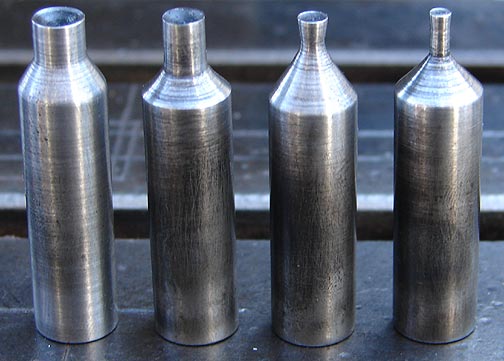 Here
they are after heat treating.
One of the new snap peens in the machine ready to go.
Here
they are after heat treating.
One of the new snap peens in the machine ready to go.
 Below can be seen three bars already riveted and one
bar end ready for the rivet head to be formed. These bars are
only 1/16" in diameter.
Below can be seen three bars already riveted and one
bar end ready for the rivet head to be formed. These bars are
only 1/16" in diameter.
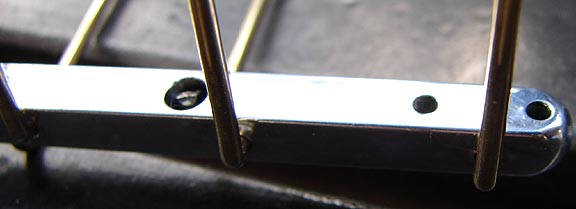
 Several riveted
bars may be seen here.
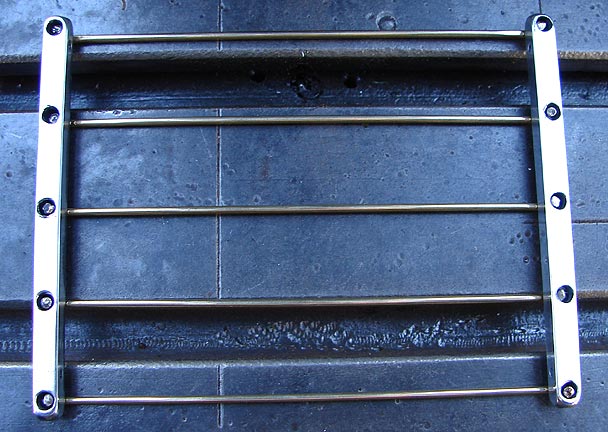
Though the orbital riveter was designed for air pressure
control, it works perfectly for my needs under manual control.
The bars shown above were hardened brass. The FrankenRiveter works
equally well on stainless steel bar ends. This piece of junk has
actually turned out to be a nice tool.
Several riveted
bars may be seen here.
Though the orbital riveter was designed for air pressure
control, it works perfectly for my needs under manual control.
The bars shown above were hardened brass. The FrankenRiveter works
equally well on stainless steel bar ends. This piece of junk has
actually turned out to be a nice tool.