A Small MicroProto Systems MicroMill 2000 HD/LE
Copyright 2013 by James P. Riser
After coming out of a restaurant one afternoon, I noticed
that there was a pawn shop next door to it. I had not visited
a pawn shop in over 40 years - so I thought I would check it out.
Right inside the door was this:
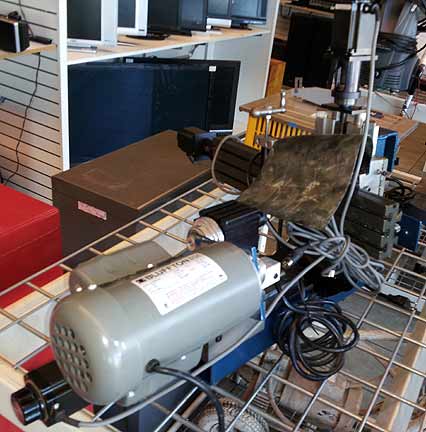 A MicroProto MicroMill
2000 HD/LE!
It was complete. The controller was in their display
case.
A MicroProto MicroMill
2000 HD/LE!
It was complete. The controller was in their display
case. 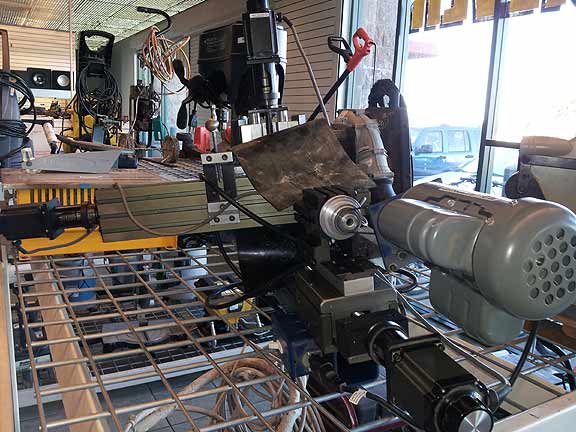 As one who loves business gambles, I decided to buy
it and see if I could get it running. It looked like new.
As one who loves business gambles, I decided to buy
it and see if I could get it running. It looked like new.
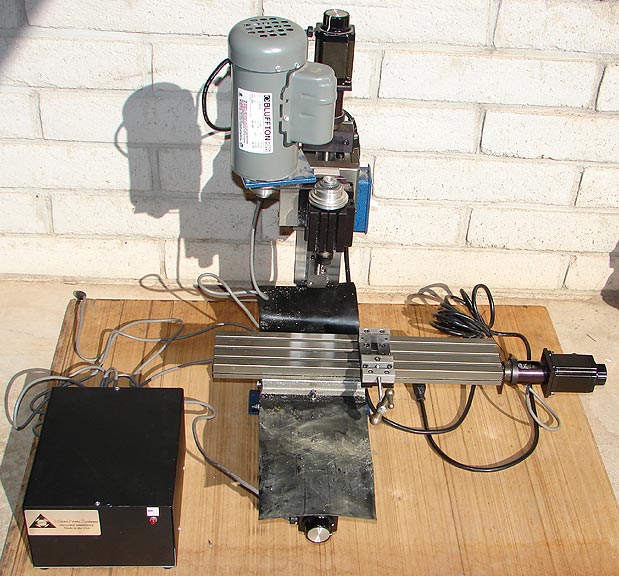
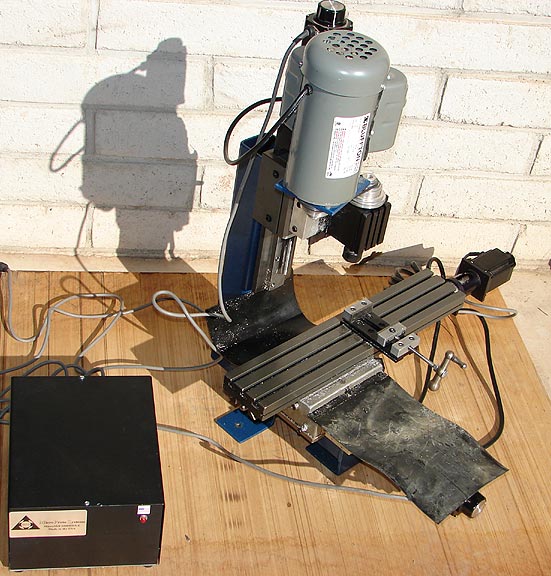
Below are several pictures of my new MicroMill. I decided
to run this machine with a module from http://www.super-tech.com/
as it converts a USB signal to the parallel interface required
by the controller and comes with an interesting software program.
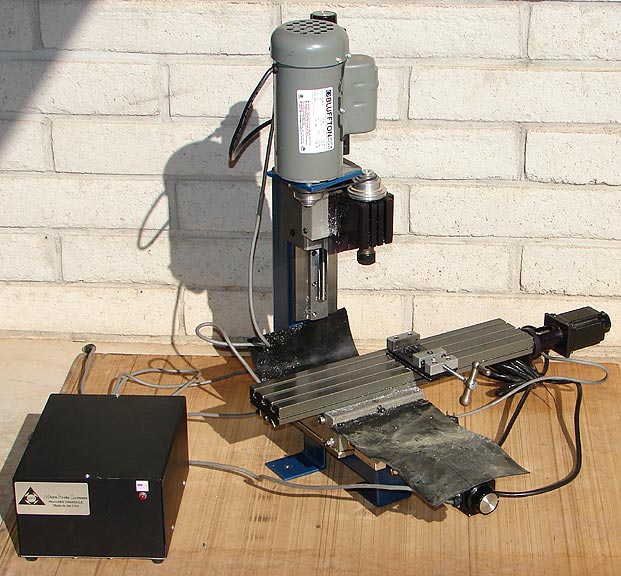
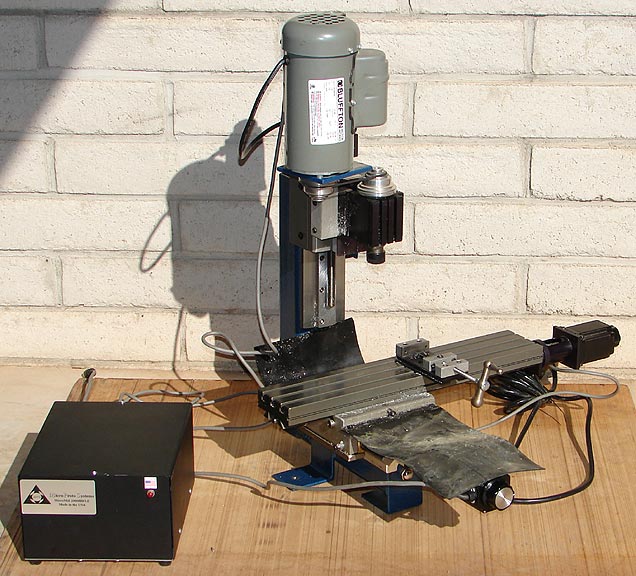
Here are several views of the mill.
 This little cnc machine requires a parallel connector
to run it. Newer computers do not come with parallel ports - so
a solution was required. I could go old school with an old computer
or go new school with USB. I chose to go new school.
The CamPod and SuperCamXp package looked like this
when it arrived.
This little cnc machine requires a parallel connector
to run it. Newer computers do not come with parallel ports - so
a solution was required. I could go old school with an old computer
or go new school with USB. I chose to go new school.
The CamPod and SuperCamXp package looked like this
when it arrived. 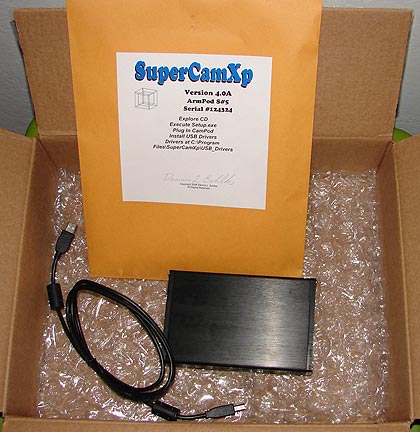
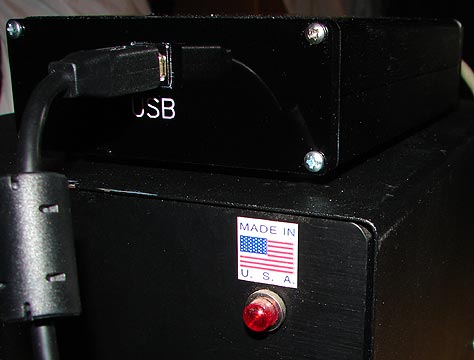 The included USB
cable plugged into the front of the CamPod unit.
This is the back side of the controller.
The included USB
cable plugged into the front of the CamPod unit.
This is the back side of the controller. 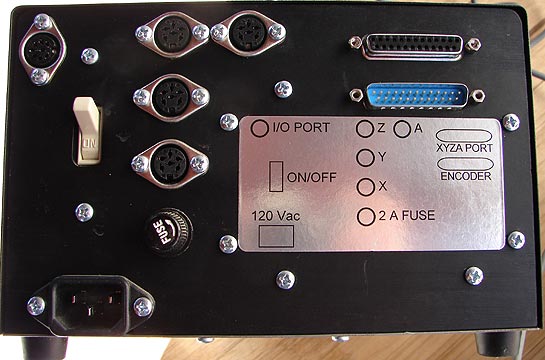
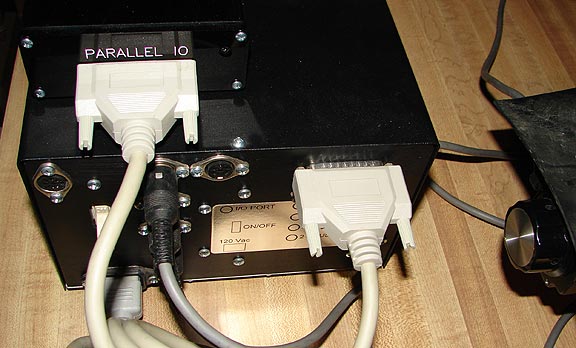 The parallel cable
attached as shown here.
The SuperCamXp software installed smoothly on both
WindowsXP and 7. You may download a trial of the software from
this site http://www.super-tech.com/
I chose this adapter system because it will allow using
the little MicroMill with newer computers and the software should
do what I want to do easily.
The parallel cable
attached as shown here.
The SuperCamXp software installed smoothly on both
WindowsXP and 7. You may download a trial of the software from
this site http://www.super-tech.com/
I chose this adapter system because it will allow using
the little MicroMill with newer computers and the software should
do what I want to do easily.
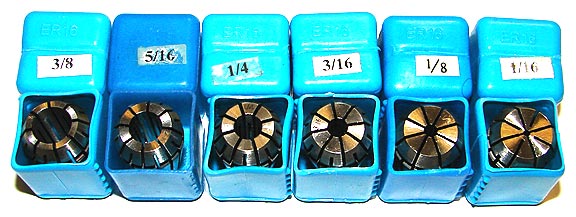 And here are the
collets.
This is the label on one of the stepper motors.
And here are the
collets.
This is the label on one of the stepper motors. 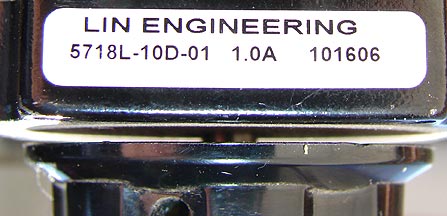
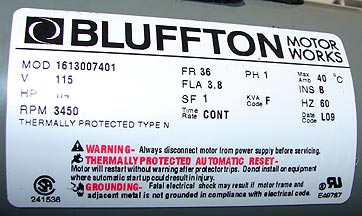 This is a 1/4 hp
motor - plenty of power for my jobs.
A tooling board under construction - to protect mill
table and for clamping.
This is a 1/4 hp
motor - plenty of power for my jobs.
A tooling board under construction - to protect mill
table and for clamping. 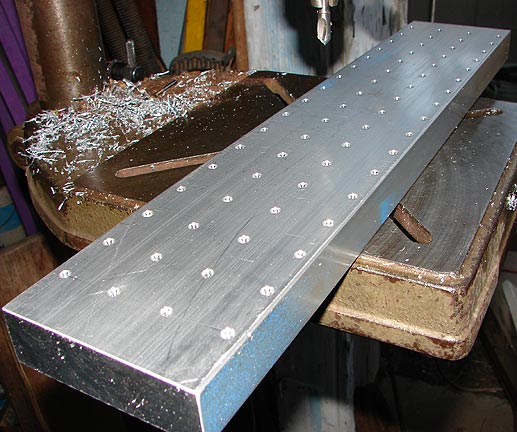
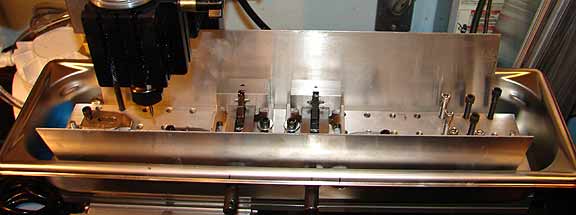
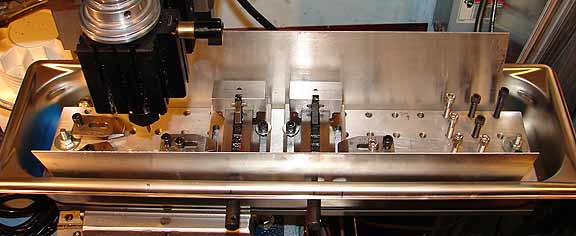
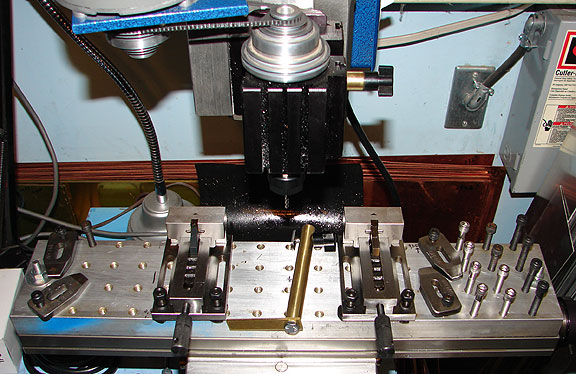 Here is the tooling
board all threaded and mounted on the mill.
The left side with a couple hold down clamps and a
small vise.
Here is the tooling
board all threaded and mounted on the mill.
The left side with a couple hold down clamps and a
small vise. 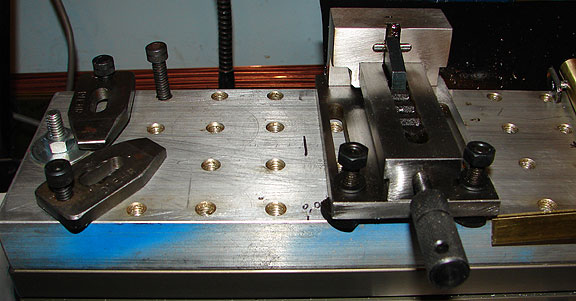
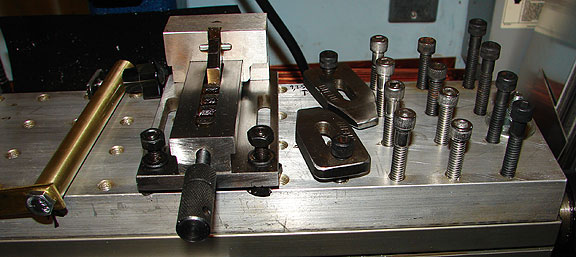 And
the right side with clamps and another small matching vise (for
longer pieces).
The assorted lengths of screws are for adjusting for
different stock thicknesses and for mounting the clamps. The brass
item is explained below.
And
the right side with clamps and another small matching vise (for
longer pieces).
The assorted lengths of screws are for adjusting for
different stock thicknesses and for mounting the clamps. The brass
item is explained below.
An Easy Method for Tool Changing on the Taig CNC Milling
Machine
Designed by James P. Riser 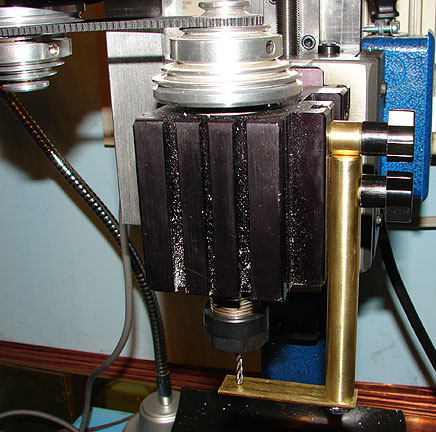 Tool changing on the small Taig CNC milling machine
can be time consuming and requiring another set of the "surface"
for each new tool installed. I came up with this simple solution
which allows setting tool height for one tool and quickly and
easily transferring this height to all tools as they get installed.
This solution is especially suited to the Taig as its
headstock has mounting slots on its body. I shall first describe
the easy construction then how to use this handy device.
Tool changing on the small Taig CNC milling machine
can be time consuming and requiring another set of the "surface"
for each new tool installed. I came up with this simple solution
which allows setting tool height for one tool and quickly and
easily transferring this height to all tools as they get installed.
This solution is especially suited to the Taig as its
headstock has mounting slots on its body. I shall first describe
the easy construction then how to use this handy device.
Construction
I chose brass as I wanted a soft metal for this job
- a metal that would not mess up the headstock slot. The brass
used is 1/2" diameter 360 brass. Two steel oval nuts were
milled narrower so that they would fit the slot in the side of
the headstock. After milling, the burrs were ground away.
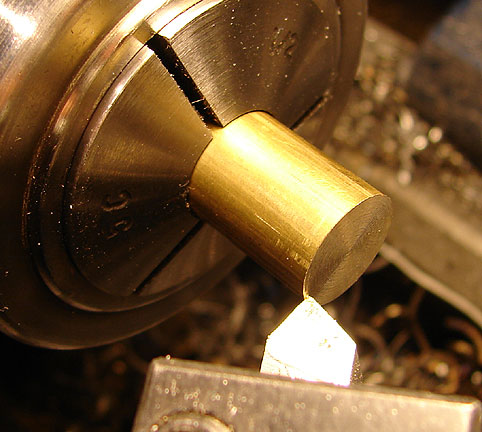
 The end of the brass rod was squared off in the lathe
and center drilled then drilled.
The end of the brass rod was squared off in the lathe
and center drilled then drilled.
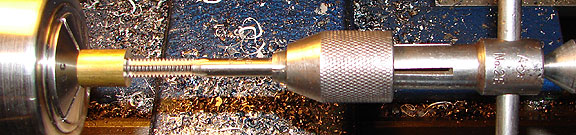
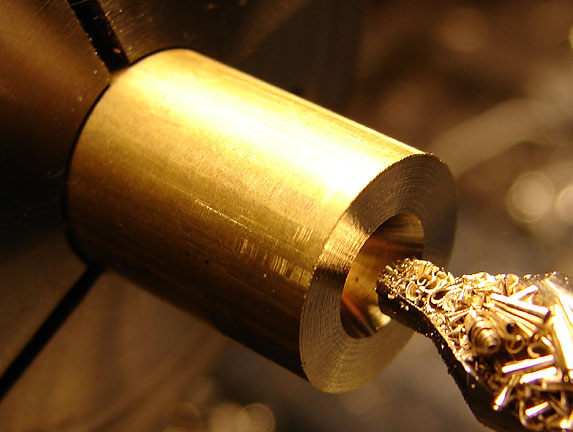 This end hole was threaded 1/4" - 20 tpi.
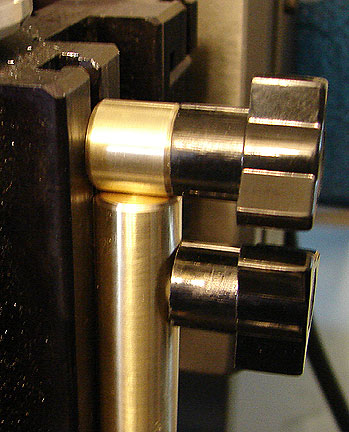
 The completed tool is shown below. The brass strip
at the end is held in place by a 1/4" - 20 tpi hex head screw.
A knob head screw attaches to the oval nut.
The completed tool is shown below. The brass strip
at the end is held in place by a 1/4" - 20 tpi hex head screw.
A knob head screw attaches to the oval nut.
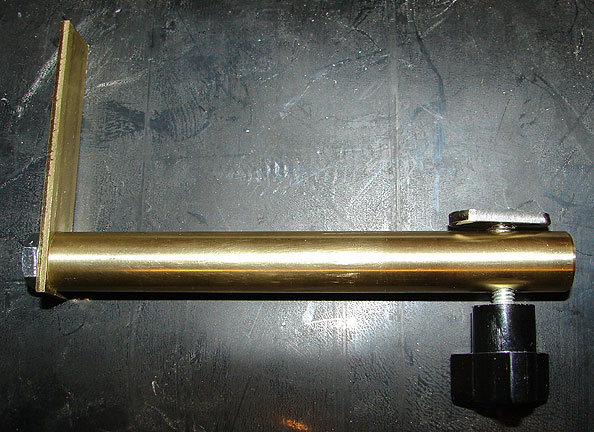 A 1/2" long section of brass was end drilled to
allow the screw to pass though to the second oval nut. This is
shown in place on the images below. This assembly forms an adjustable
stop for the above tool.
A 1/2" long section of brass was end drilled to
allow the screw to pass though to the second oval nut. This is
shown in place on the images below. This assembly forms an adjustable
stop for the above tool.
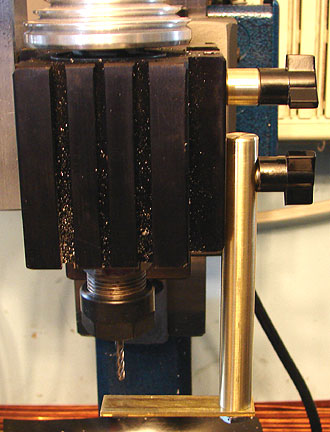
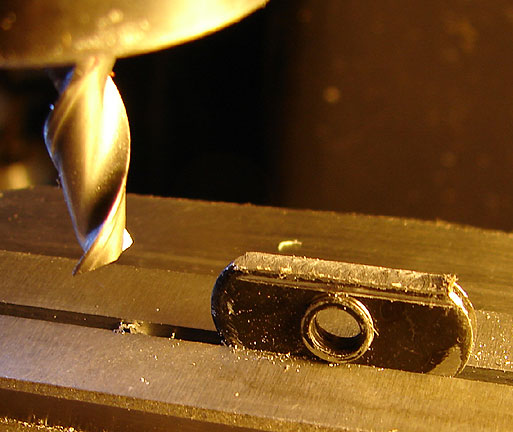
 On the left is seen the brass rod of the new tool seated
into the slot. The curve of the bar's diameter allows the slot
to align the brass. It can be tightened into any desired position
with the knob.
A ball end mill is in the machine.
In the right image it can be seen that the brass tool
has been raised up to just kiss the end mill. It is tightened
in this position and the stop is allowed to slide down to the
top of the brass tool. The stop is then tightened with its knob.
It is now possible to remove the brass tool and set
the "surface" to run your CNC program. When it comes
to the place in the program where a tool change is called for,
the cutter being used can be dropped out, a new cutter very loosely
installed, the brass tool slid up to the stop and locked into
position. The new cutter can be allowed to merely drop down to
rest on the brass tool and be tightened into the collet. It is
now at the same position as the original tool. The brass tool
can be removed and the CNC program resumed. This will work even
if a different size of collet needs to be installed along with
the new cutter.
Nothing could be simpler, cheaper, nor faster.
On the left is seen the brass rod of the new tool seated
into the slot. The curve of the bar's diameter allows the slot
to align the brass. It can be tightened into any desired position
with the knob.
A ball end mill is in the machine.
In the right image it can be seen that the brass tool
has been raised up to just kiss the end mill. It is tightened
in this position and the stop is allowed to slide down to the
top of the brass tool. The stop is then tightened with its knob.
It is now possible to remove the brass tool and set
the "surface" to run your CNC program. When it comes
to the place in the program where a tool change is called for,
the cutter being used can be dropped out, a new cutter very loosely
installed, the brass tool slid up to the stop and locked into
position. The new cutter can be allowed to merely drop down to
rest on the brass tool and be tightened into the collet. It is
now at the same position as the original tool. The brass tool
can be removed and the CNC program resumed. This will work even
if a different size of collet needs to be installed along with
the new cutter.
Nothing could be simpler, cheaper, nor faster.
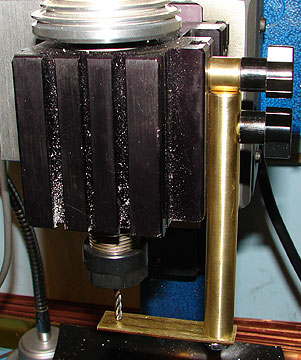
 Here is a close-up view of the stop and the brass tool
in the raised position.
Here is a close-up view of the stop and the brass tool
in the raised position.
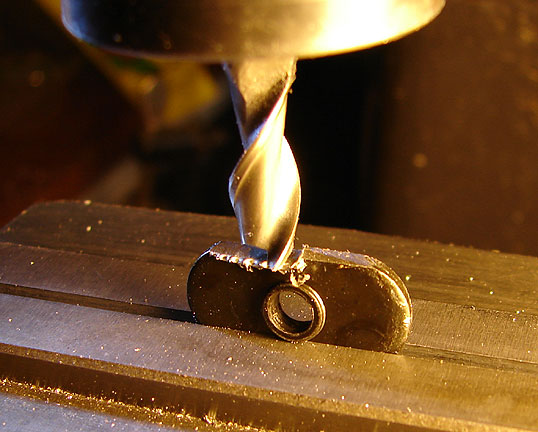
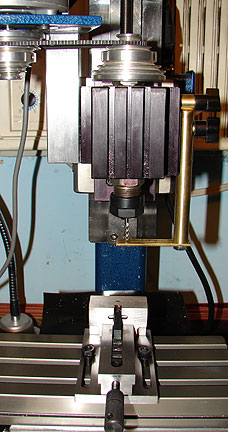
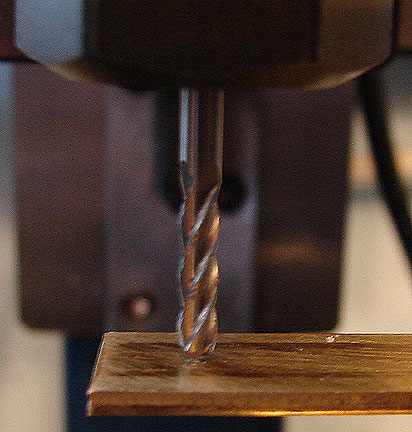
 Here is a cutter just kissing the brass plate.
 The final item is shown below.
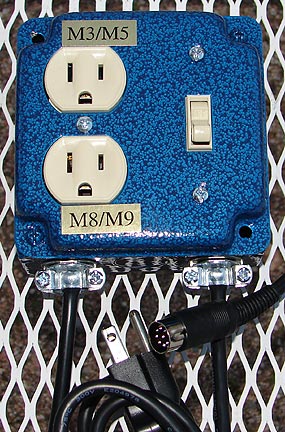 The relay switch
box for controlling the spindle/collant/vacuum by software.
Things have come together nicely and I am ready to
cut material.
The relay switch
box for controlling the spindle/collant/vacuum by software.
Things have come together nicely and I am ready to
cut material.
OK, first job with this little gem was one in which
I needed to drill thousands of small holes in very specific locations
on lengths of square aluminum bar.
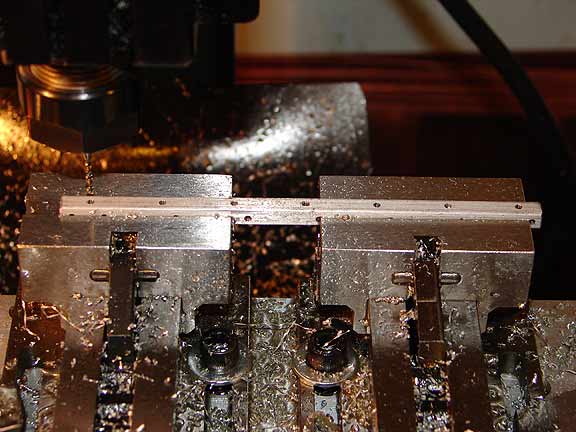 I drilled with
cutting oil and things were a mess - chips and oil all over the
machine.
Here is a close-up of part of the job.
I drilled with
cutting oil and things were a mess - chips and oil all over the
machine.
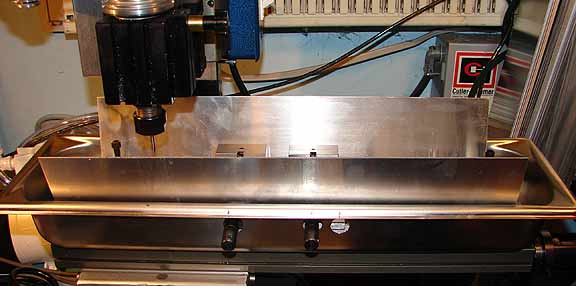
Here is a close-up of part of the job.  I decided to add a chip pan for collecting chips and
oil. This would keep things better contained.
I decided to add a chip pan for collecting chips and
oil. This would keep things better contained.
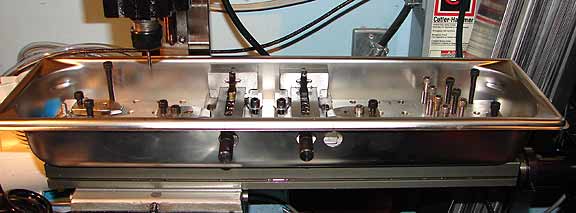 Notice that I have drilled handle
holes for the double vise setup.
Barely visible in the back left pan corner is the drain
petcock.
Notice that I have drilled handle
holes for the double vise setup.
Barely visible in the back left pan corner is the drain
petcock. 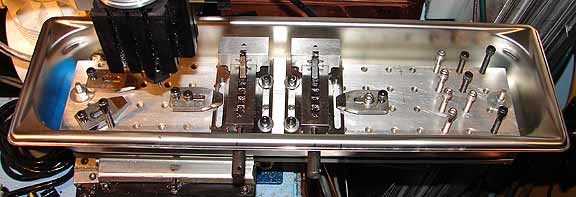
 The third hole in front allows
me to move the right vise 1" to the right.
To better contain chips and splash, I added a removable
aluminum plate.
The third hole in front allows
me to move the right vise 1" to the right.
To better contain chips and splash, I added a removable
aluminum plate. 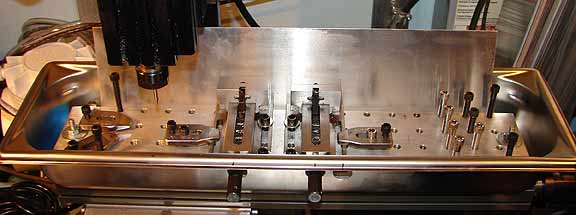
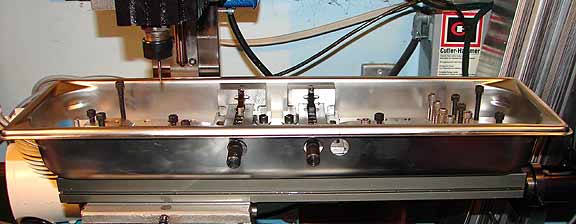
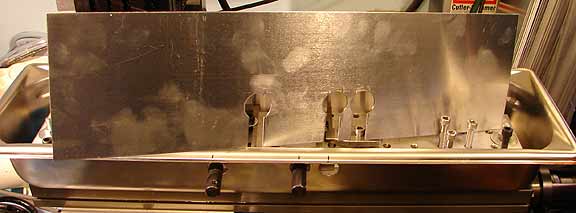 The removable front
plate looks like this.
Additional views with the two shields in place:
The removable front
plate looks like this.
Additional views with the two shields in place:
 I also have a shorter rear shield for working close
to the tooling board.
Using the slick SuperCamXp software required only a
series of points for drilling the holes.
I also have a shorter rear shield for working close
to the tooling board.
Using the slick SuperCamXp software required only a
series of points for drilling the holes. 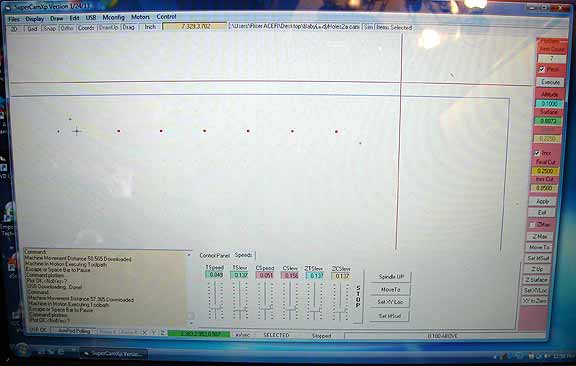
 The holes were
all peck drilled in .050" increments.
OK, my drip system is completed.
The holes were
all peck drilled in .050" increments.
OK, my drip system is completed.
 I have set it up
so that I may blow air only or ...
Cutting oil/lubricant.
I have set it up
so that I may blow air only or ...
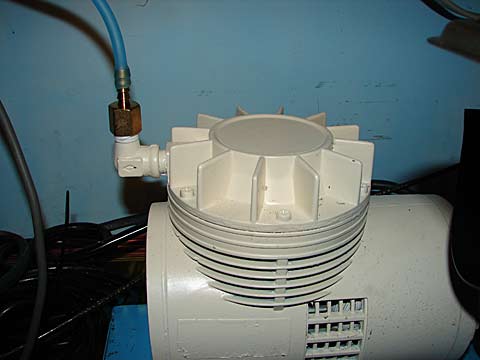
Cutting oil/lubricant.  The small air compressor is used to blow chips away
when cutting dry. The plastic bottle will contain the cutting
oil.
The small air compressor is used to blow chips away
when cutting dry. The plastic bottle will contain the cutting
oil.
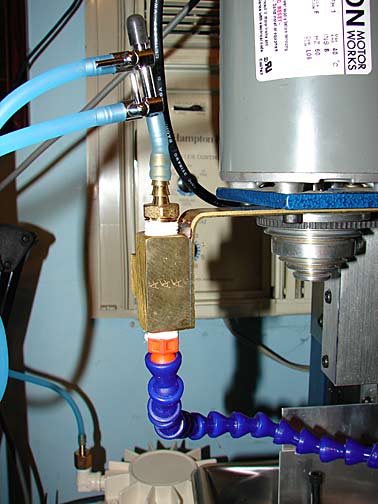 The two small valves
control both air and oil flows.
Control of the air or oil flow to the cutting tip.
The two small valves
control both air and oil flows.
Control of the air or oil flow to the cutting tip.
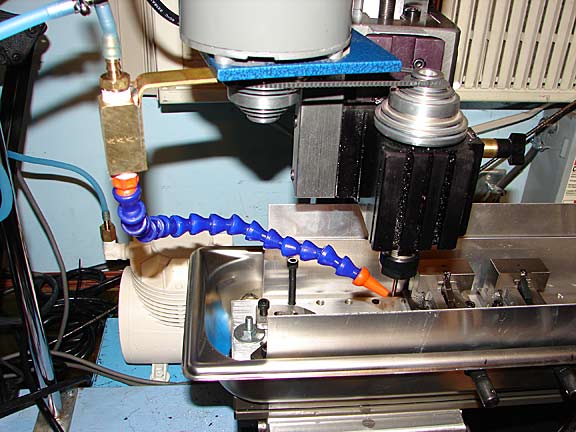 This new system eliminates the need to dab on cutting
oil or to brush away dry chips.
This new system eliminates the need to dab on cutting
oil or to brush away dry chips.