A Few Things about my DeWALT DW788 Scroll Saw
Copyright 2000 by James
P. Riser
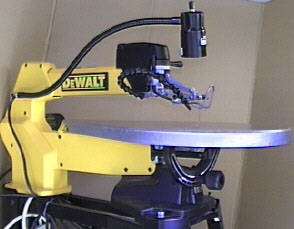
This will most likely be the last scroll saw that I
ever buy. I love this saw! It is pictured below:
 As soon as this saw (or any scroll saw with a cast
iron table) is assembled, the table should get its first protection.
I wax mine with specially prepared beeswax to prevent rusting
and to promote easier sliding of the work piece during cutting.
As soon as this saw (or any scroll saw with a cast
iron table) is assembled, the table should get its first protection.
I wax mine with specially prepared beeswax to prevent rusting
and to promote easier sliding of the work piece during cutting.
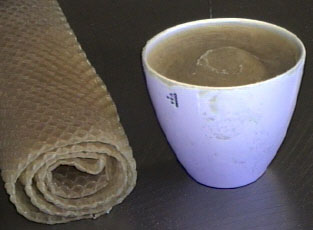
The beeswax that I use was purchased at an arts and
crafts store in the candle department. It came as a flat sheet.
It is shown here rolled up for storage. The prepared beeswax is
shown in the small container.
 To prepare the beeswax I merely broke it into small
pieces and placed them in the container. Next I added pure turpentine
(not mere thinner!) and mixed it up. After letting things sit
for a day or so, the beeswax will form a thick paste wax suitable
for putting on your saw table. All I do is spread some of the
wax on the table, rub it in, and buff it. One paper towel square
does it all. Do not use too much wax. Repeat this wax application
as often as you feel it is needed. By the way, such a beeswax
preparation is great for using on turned wood (apply it while
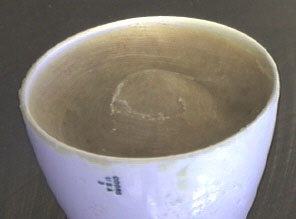
the item is rotating in the lathe). Below is a closeup of the
beeswax mixture to show how thick I make it. If you get yours
too thin, just add bees wax.
To prepare the beeswax I merely broke it into small
pieces and placed them in the container. Next I added pure turpentine
(not mere thinner!) and mixed it up. After letting things sit
for a day or so, the beeswax will form a thick paste wax suitable
for putting on your saw table. All I do is spread some of the
wax on the table, rub it in, and buff it. One paper towel square
does it all. Do not use too much wax. Repeat this wax application
as often as you feel it is needed. By the way, such a beeswax
preparation is great for using on turned wood (apply it while
the item is rotating in the lathe). Below is a closeup of the
beeswax mixture to show how thick I make it. If you get yours
too thin, just add bees wax.
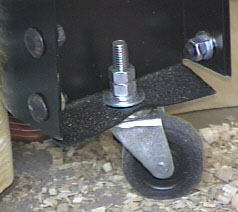
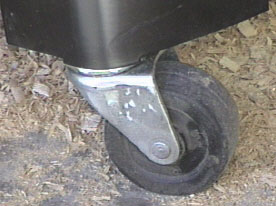
I require my scroll saw to be movable, so I added casters
to the legs. I used the type with a threaded attachment as shown.
Note that I needed to slightly bend the steel leg bottom to get
the casters perpendicular to the shop floor. The saw easily moves
as I need to reposition things in my shop. The saw is so stable
and vibration free that I really do not require locking casters.
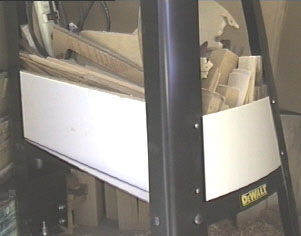
I also prefer some "scrap" storage close
to my saw. So I made the little storage area shown below. The
base and curved front are made from melamine (tempered hardboard
with smooth white finish). The longer sidewalls are of 3/4"
thick pine board to which I glued additional melamine for looks.
The next thing I'll show and describe is my home made
lever arm to hold the saw upper arm in the "up" position
while doing fretwork. This really helps when trying to thread
the thin saw blade up through tiny holes in the project. This
lever arm was inspired by the "Saw Buddy" and the "EZ
Lift" products available on the web.
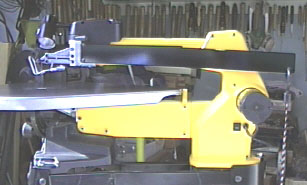 The image at the left shows the lever in relationship
to the complete saw. The lever is made of a length of 1/8"
thick steel (2 1/8" wide by 23" long).
The image at the left shows the lever in relationship
to the complete saw. The lever is made of a length of 1/8"
thick steel (2 1/8" wide by 23" long).
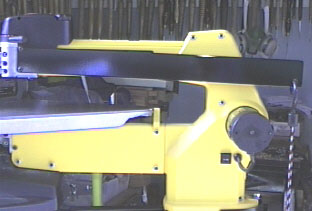 Three holes are drilled...two to mount the steel lever
and one for the bungee cord hook.
Three holes are drilled...two to mount the steel lever
and one for the bungee cord hook.
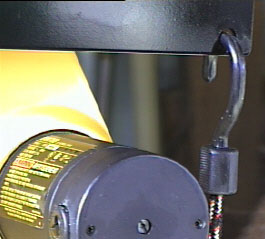 This is a closeup of the hole for the bungee cord hook.
The other end of the bungee hooks to the saw base (no holes need
to be drilled).
This is a closeup of the hole for the bungee cord hook.
The other end of the bungee hooks to the saw base (no holes need
to be drilled).
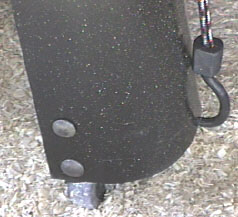 The image at the right shows how the bungee hooks onto
the back leg of the saw base.
Click here to return to
my machinery page.
The image at the right shows how the bungee hooks onto
the back leg of the saw base.
Click here to return to
my machinery page.