Making an Inexpensive Card Trimmer
Copyright 2011 by James
P. Riser
Click here to
go to my main magic related web page.
Magicians are often seeking a card trimmer for making
gimmicked card decks or individual cards. The real
card trimmer tools are very expensive antiques and fairly
difficult to find. I offer the following as a solution for those
wanting to make limited numbers of trimmed playing cards. Too
often beginning and creative magicians are limited by the lack
of access to specialized tooling to make their creations come
to life. Hopefully this web page will be of help to such individuals.
I have attempted to make everything as simple and easy as possible
so that effort might be spent on magic creation rather than tool
building. You will need to invest around $20. If this is too expensive
for you, try scissors.
The trimmer itself is a small photo trimmer made by
Fiskars. I ran across it in a craft store and felt that with minimal
modifications it could become a workable playing card trimmer.
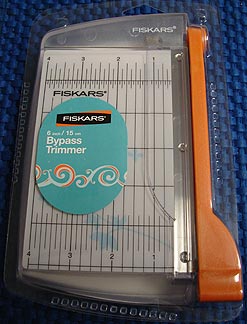 This is the trimmer
as found in the craft store.
The first thing I wanted to do was to see if it could
trim a playing card.
This is the trimmer
as found in the craft store.
The first thing I wanted to do was to see if it could
trim a playing card. 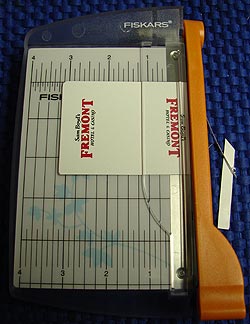
 The ability to
delicately shave off the edges of the playing cards was necessary.
This little trimmer can do the job nicely.
The ability to
delicately shave off the edges of the playing cards was necessary.
This little trimmer can do the job nicely.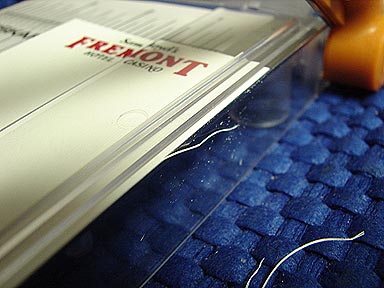 As seen in the pictures, there is a thin plastic pressure
guard which will securely hold the card down without buckling
during the cutting process. In addition, this guard keeps fingerprints
off of the cards. This is a nice feature of this trimmer.
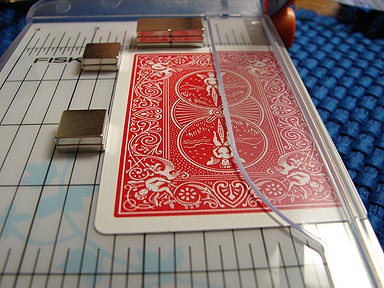
Holding the cards in the required position is critical
for making the required cuts. To temporarily test this trimmer
I utilized neo-magnets for the task. Two workable positions for
the magnets are shown below. I doubled up the magnets for extra
holding strength. (I have a huge assortment of such magnets available
for other items that I manufacture - so I thought I would use
a few.)
As seen in the pictures, there is a thin plastic pressure
guard which will securely hold the card down without buckling
during the cutting process. In addition, this guard keeps fingerprints
off of the cards. This is a nice feature of this trimmer.
Holding the cards in the required position is critical
for making the required cuts. To temporarily test this trimmer
I utilized neo-magnets for the task. Two workable positions for
the magnets are shown below. I doubled up the magnets for extra
holding strength. (I have a huge assortment of such magnets available
for other items that I manufacture - so I thought I would use
a few.)
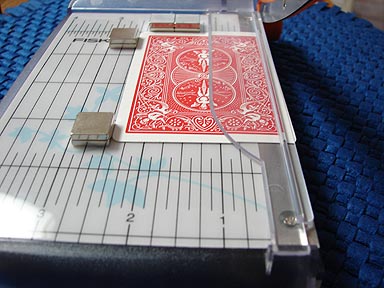 Additional magnets underneath the cutter base hold
the top magnets in position.
Additional magnets underneath the cutter base hold
the top magnets in position.
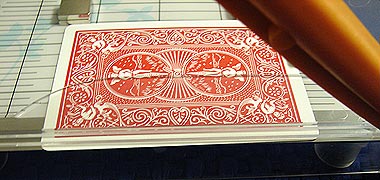
 Magicians are concerned with making both straight and
angled cuts to the card edges.
The ruled lines on the trimmer base
clearly show how the playing card
is held in a slightly angled position.
This will give a taper to the edge
being trimmed.
Very little edge is trimmed.
Below can be seen that the right corner will not be
trimmed at all while the left corner will be slightly trimmed
off with a nice smooth taper the full length of the card. This
is how regular stripper decks are made - a quick and simple task
with this trimmer.
Magicians are concerned with making both straight and
angled cuts to the card edges.
The ruled lines on the trimmer base
clearly show how the playing card
is held in a slightly angled position.
This will give a taper to the edge
being trimmed.
Very little edge is trimmed.
Below can be seen that the right corner will not be
trimmed at all while the left corner will be slightly trimmed
off with a nice smooth taper the full length of the card. This
is how regular stripper decks are made - a quick and simple task
with this trimmer.
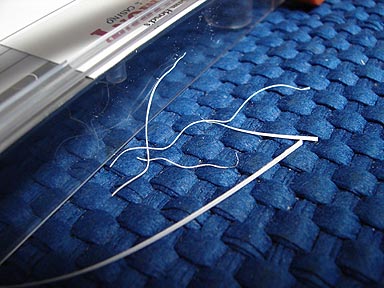
 Now, it is possible to control the length of this tapered
cut so that the cut is made only to the midpoint of the card edge.
The card is then flipped end for end and the other half of the
same edge is trimmed. This leaves a concave cut on the card edge.
Both ends are wider than the card center. Both edges of the card
are trimmed like this to create the concave edges required. This
concave cut may be seen in the pictures below. The picture on
the left is a view along this trimmed edge. The picture on the
right shows this trimmed edge next the straight edge of an untrimmed
playing card. The gap seen is caused by the concave edge. The
depth of the concave cut is dictated by the performer's skill
and requirements. Therefore, it is necessary to experiment to
get the cuts as desired. This is true on even the most expensive
trimmers.
Now, it is possible to control the length of this tapered
cut so that the cut is made only to the midpoint of the card edge.
The card is then flipped end for end and the other half of the
same edge is trimmed. This leaves a concave cut on the card edge.
Both ends are wider than the card center. Both edges of the card
are trimmed like this to create the concave edges required. This
concave cut may be seen in the pictures below. The picture on
the left is a view along this trimmed edge. The picture on the
right shows this trimmed edge next the straight edge of an untrimmed
playing card. The gap seen is caused by the concave edge. The
depth of the concave cut is dictated by the performer's skill
and requirements. Therefore, it is necessary to experiment to
get the cuts as desired. This is true on even the most expensive
trimmers.
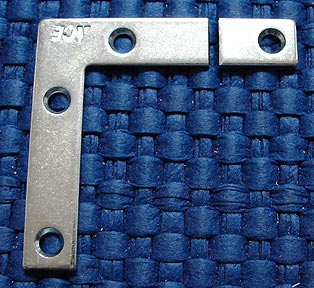
 There is another nicer way to control the angle of
cut. You will need to buy a steel angle piece from your local
hardware store. I bought mine at ACE Hardware.
There is another nicer way to control the angle of
cut. You will need to buy a steel angle piece from your local
hardware store. I bought mine at ACE Hardware.
 I first sheared
off the end of one arm of the angle for clearance.
The angle steel is held in position by 3 sets of neo-magnets
under the base.
I first sheared
off the end of one arm of the angle for clearance.
The angle steel is held in position by 3 sets of neo-magnets
under the base. 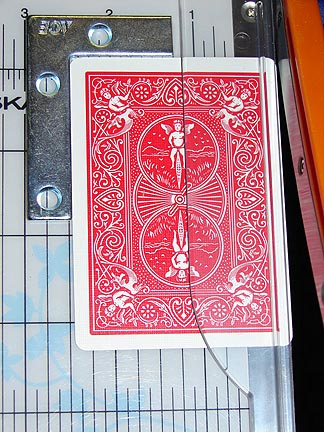 This works beautifully.
Below I explain how to control the length of cut for
making such negative strippers.
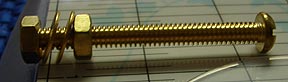 The first thing
needed is a 3" long by 1/4" - 20 brass machine screw,
nuts, and washers.
A 1/4" hole is drilled through the trimmer handle
and the brass screw is installed.
The first thing
needed is a 3" long by 1/4" - 20 brass machine screw,
nuts, and washers.
A 1/4" hole is drilled through the trimmer handle
and the brass screw is installed.
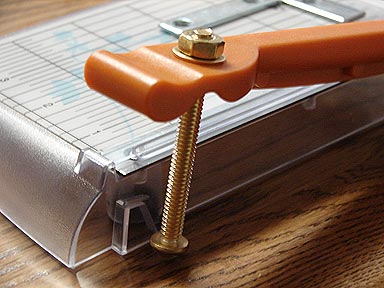
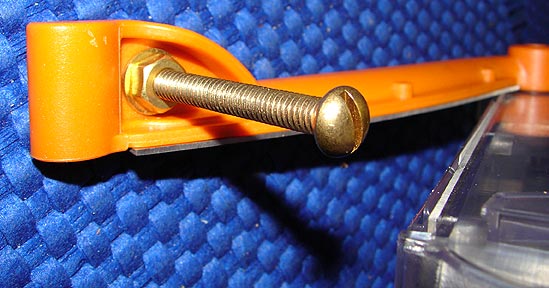 This brass screw acts as an adjustable stop for the
cutter.
This brass screw acts as an adjustable stop for the
cutter.
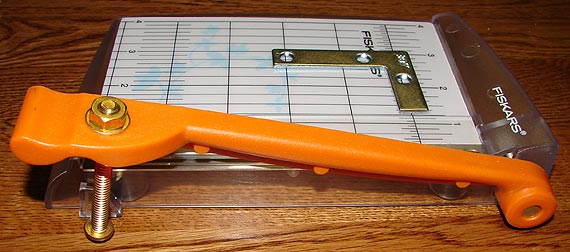
 The trimmer now
looks like this.
In use, the trimmer must be placed on a smooth hard
surface so that the stop will be consistent.
The trimmer now
looks like this.
In use, the trimmer must be placed on a smooth hard
surface so that the stop will be consistent.
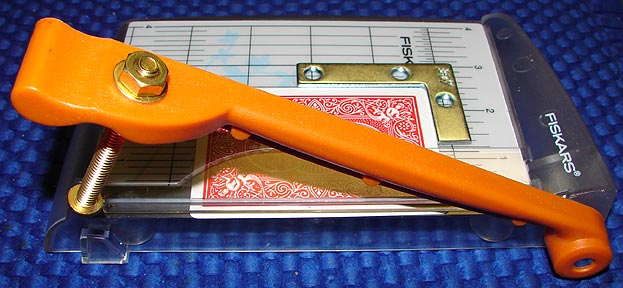
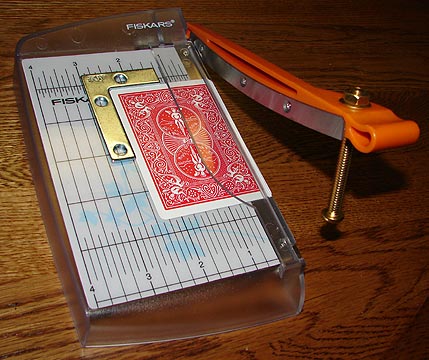
 Here is the completed playing card trimmer ready to
go to work.
Here is the completed playing card trimmer ready to
go to work.
 This trimmer may also be setup to trim the ends of
the cards. As with all card trimmers, careful adjustments are
necessary.
If you do not know what to do with the trimmed cards,
perhaps you do not need a card trimmer.
Note: If this info was useful to you, please
let me know. No feedback means no more such web pages.
This trimmer may also be setup to trim the ends of
the cards. As with all card trimmers, careful adjustments are
necessary.
If you do not know what to do with the trimmed cards,
perhaps you do not need a card trimmer.
Note: If this info was useful to you, please
let me know. No feedback means no more such web pages.